Smoky Savoury Porta Pit Chicken Pockets Ovenbaked Edition
- Decoding the Crave: What Makes This Porta Pit Chicken Unique?
- From Backyard Dream to Kitchen Reality: Introducing Our Pockets
- Assembling the Core Components for Legendary Flavor
- The Essential Toolkit: What You Need Beyond the Pantry
- Phase One: Achieving Ultra-Tender Pulled Chicken
- Phase Two: Constructing and Sealing the Porta Pit Chicken Pockets
- Elevating the Experience: Serving Suggestions and Pairings
- Recipe FAQs
- 📝 Recipe Card
Decoding the Crave: What Makes This Porta Pit Chicken Unique?
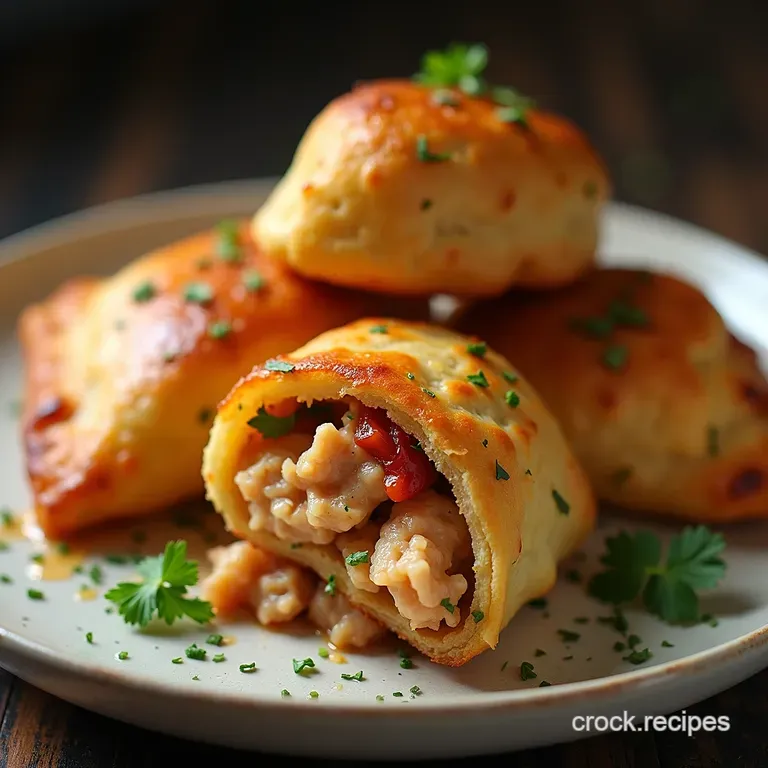
The term "Porta Pit Chicken" conjures images of authentic, slow smoked barbecue, the kind that requires hours spent tending a brick pit or smoker. This recipe aims to capture that soul satisfying depth of flavour that beautiful balance of smoke, tang, and sweetness and translate it into a format beloved by comfort food enthusiasts everywhere: a perfectly crisp, portable pocket.
What makes this variation unique is the marriage of that intensely flavoured, ultra tender pulled chicken with a substantial, flaky pastry casing. It transforms smoky barbecue leftovers into an entirely new, hearty meal.
We are taking the essence of a classic BBQ pit chicken recipe , known for its incredible tenderness achieved through low-and-slow cooking, and encasing it in a buttery shell, creating a flavorful chicken recipe masterpiece that stands proudly on its own.
This isn't just chicken wrapped in dough; it’s a deliberate culinary construction designed for maximum enjoyment.
From Backyard Dream to Kitchen Reality: Introducing Our Pockets
Our goal here is democratizing deep barbecue flavour. Traditional Porta Pit Chicken often implies a specific commercial unit or a large outdoor setup, but we are simplifying the method without sacrificing integrity.
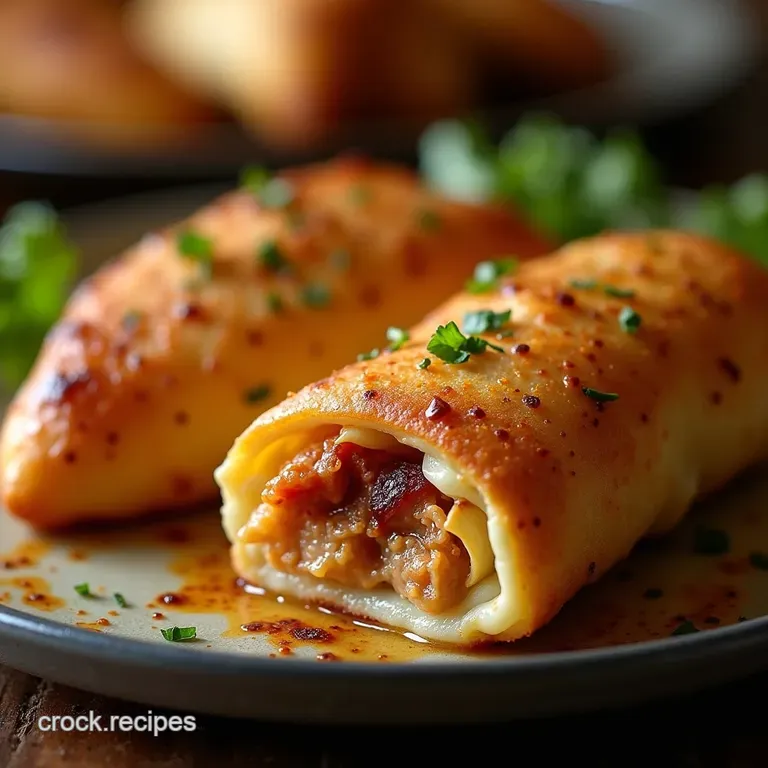
This recipe focuses on achieving that signature texture and taste using standard kitchen equipment. We are creating satisfying, individual parcels stuffed pastries that deliver that authentic, smoky interior with every bite.
If you’ve ever looked for an Easy Porta Pit Chicken solution that rivals the real thing, this is it. The resulting product is a robust, hand held lunch or dinner, a testament to how achievable Homemade Porta Pit Chicken truly is.
The Secret Sauce Behind Authentic Pit Flavor at Home
Achieving that unmistakable smoky depth without an actual pit requires strategic spice application and the right liquid balance during the long cooking cycle. Our Port a pit chicken marinade —which functions more as a braising liquid in this method relies heavily on smoked paprika and a touch of cayenne to mimic the slow kiss of smoke.
The addition of apple cider vinegar provides the necessary tang that cuts through the richness, a hallmark of many traditional barbecue preparations. On top of that,, the use of chicken thighs ensures the meat stays moist throughout the long cook time, absorbing maximum flavour from the braising juices.
Why This Baked Pocket Method Beats Traditional Methods
While grilling or smoking adds direct smoke compounds, baking the assembled pockets offers a controlled environment for achieving a superior pastry crust. When we first slow cook the chicken, we are mimicking the pit's tenderness.
However, trying to recreate a crisp exterior in a smoker can lead to dry meat or a tough crust. By baking the filled pockets at a high temperature after the filling has cooled, we exploit the butter in the pastry to create incredible flakiness, resulting in a golden shell that perfectly contrasts the moist, savoury interior.
This two-step process guarantees both the internal moisture and the external crispness required for a perfect pastry package.
A Culinary Tribute to Smoky Barbecue Legends
This recipe acts as a loving tribute to the legends of slow cooked meat. The foundation of this dish is rooted in the concept of slow cooked chicken recipe perfection, where time is the primary ingredient.
The chicken is gently simmered in aromatic liquids until it yields completely, allowing the connective tissues to break down beautifully. This process ensures that when you pull the meat apart, it’s practically melting, ready to be seasoned further with its own concentrated cooking juices before being tucked away safely inside its doughy embrace.
Assembling the Core Components for Legendary Flavor
To create our Porta Pit Chicken Pockets , we must first master the two primary elements: the intensely flavoured filling and the structurally sound, flaky pastry casing. Success hinges on the quality and preparation of these components.
We are utilizing boneless, skinless chicken thighs the superior choice for shredded meat dishes due to their higher fat content, which prevents them from drying out during the long, slow braise required for this flavour profile.
The filling requires a robust spice blend, featuring smoked paprika and cumin, simmered until the sauce reduces and clings tightly to the shredded meat, ensuring that every single pocket delivers a punch of flavour.
Related Recipes Worth Trying
- The Connoisseurs Port Chicken Recipe with Thyme — Learn how to make Port chicken with a rich winebraised reduction This elegant chicken dinner is surprisingly simple and packed with flavour
- The Ultimate Kickin Buffalo Chicken Pasta Salad Recipe — Ditch the ordinary picnic fare This cold Buffalo Chicken Pasta Salad with Ranch and blue cheese is perfectly tangy creamy and ready for your summer BBQ
- Normandys Delight Classic French Chicken Casserole a la Normande — Make a truly comforting Classic French Chicken Casserole with this foolproof recipe Rich with cider and cream its the perfect Chicken Normandy supper
The Essential Toolkit: What You Need Beyond the Pantry
While the ingredients define the taste, the right tools ensure the right texture. For the chicken, a heavy bottomed Dutch oven is your best friend, as it distributes heat evenly for that essential slow cooking phase. However, the real technical focus shifts to the pastry.
You’ll need a reliable rolling pin and parchment paper for easy cleanup, but the true secret weapon for this Porta Pit Chicken Recipe is patience and cold hands when working the dough.
Selecting the Perfect Poultry Cut for Shredding
As mentioned, chicken thighs are non-negotiable for the best results here. While breasts are leaner, the fat marbling in the thighs renders during the 3-hour slow cooked chicken recipe process, basting the meat from within and yielding a much more succulent final product.
When cooked properly, they shred like silk, easily absorbing the tangy, spiced braising liquor.
Mastering the Spice Rub: Creating the Savoury Crust
The flavour profile leans heavily on dry spices bloomed in the initial searing stage and then carried through the braise. We are layering smoked paprika for that essential 'pit' flavour, balanced with earthiness from cumin and a warming kick from chili powder.
Salt and pepper are applied liberally before searing; this initial seasoning helps build a slightly browned exterior on the meat, adding another layer of complexity before it even enters the liquid bath.
Beyond the Filling: Selecting the Ideal Pocket Wrapper
For true textural contrast, we opt for a basic, yet reliable, shortcrust pastry made from scratch. This crust bakes up firm enough to hold the moist filling while still offering a delightful, buttery crumb.
Crucially, we chill the butter and use ice water this prevents the butter from fully integrating into the flour before baking, allowing it to create pockets of steam that separate the dough layers, resulting in that beautiful flakiness we desire.
Liquids and Aromatics: Building the Slow Cook Base
The braising liquid is where the "pit" essence is truly infused. Beyond the standard stock and aromatics like onion and garlic, we incorporate apple cider vinegar and Worcestershire sauce.
These acidic and umami rich components prevent the final flavour from being flat, giving it that characteristic tangy barbecue depth that makes this flavorful chicken recipe so addictive.
Phase One: Achieving Ultra Tender Pulled Chicken
The first major phase is dedicated entirely to transforming the raw chicken into succulent, shreddable strands saturated with flavour. Begin by searing the seasoned chicken thighs in a hot Dutch oven until golden brown on all sides; this crucial step creates the Maillard reaction, deepening the overall taste profile.
Next, sauté your diced onions until soft, then introduce the minced garlic briefly before pouring in the mixed braising liquid your stock, vinegar, sugar, and spice blend. Nestle the seared chicken back into this fragrant bath, cover tightly, and commit to the long haul.
Whether you use a low oven set to 300° F ( 150° C) or a dedicated slow cooker setting, the goal is 2.5 to 3 hours of gentle coaxing until the meat offers absolutely no resistance when tested with a fork.
Phase Two: Constructing and Sealing the Porta Pit Chicken Pockets
Once the chicken is perfectly tender, the focus shifts entirely to packaging. The absolute most critical step here is cooling the cooked filling completely. Warm filling will melt the butter in your raw pastry dough, destroying the structure and resulting in a dense, greasy bottom instead of a flaky one.
While the chicken cools, you prepare your shortcrust pastry, ensuring it remains well chilled. Roll out the dough to an even thickness, cut it into the desired shapes (squares or circles work well for sealing), and heap a measured portion of the cooled, shredded filling onto one half of the dough.
Slow Simmering Techniques for Maximum Moisture Infusion
The secret to infusing the slow cooked meat is the reduction process. After shredding the chicken, you must return it to the braising liquid. Then, continue simmering it uncovered over medium heat.
As the liquid evaporates, the sugars caramelize slightly, and the remaining sauce thickens into a rich glaze that coats every strand. This concentrated mixture is what provides the powerful flavour impact inside your final baked pocket.
Shredding Secrets: How to Handle the Cooked Meat
The best method for shredding thighs cooked this way is using two sturdy forks, pulling them apart gently. Avoid overly aggressive shredding; you want distinct strands coated in sauce, not a purée.
Once shredded and mixed back into the reduced sauce, let the mixture cool completely on a tray or in the refrigerator until firm this makes it far easier to handle when filling the pastry rounds.
Folding and Crimping: Ensuring No Filling Escapes
When folding your pastry, ensure you leave a clean, dry border around the edges moisture prevents a tight seal. Lay the top piece of dough over the filling, then use the tines of a fork to press firmly around the entire perimeter.
This crimping action not only seals the contents but also adds a decorative finish, ensuring that none of that delicious, slow cooked filling leaks out during the baking process.
Pre-Bake Prep: Achieving That Golden Exterior Sheen
Before they enter the oven, a quick egg wash is essential. Beat one egg with a splash of water to create an egg wash. Brush this mixture evenly over the entire surface of each sealed pocket.
This protein wash browns beautifully in the oven’s heat, giving your Easy Porta Pit Chicken pockets that signature deep golden colour and appetizing sheen synonymous with high-quality baked goods.
Elevating the Experience: Serving Suggestions and Pairings
While these pockets are supremely satisfying on their own, they truly sing when paired with something bright and acidic to balance the richness of the pastry and the depth of the smoky chicken. Think fresh, crisp sides.
Maximizing Shelf Life: Storage and Reheating the Pockets
These pockets store exceptionally well. Once completely cooled, airtight containers in the refrigerator will preserve them nicely for up to four days. For reheating, the best method is back in a moderate oven (around 350° F or 175° C) for about 10- 15 minutes.
This allows the pastry to crisp up again without drying out the filling. Microwaving is possible but will soften the crust significantly.
Flavor Variations: Introducing Non-Traditional Add-ins
To take your Homemade Porta Pit Chicken in new directions, consider adding finely diced pickled jalapeños or a spoonful of sharp, quality mustard directly into the cooled, shredded chicken mix before assembly. These additions introduce an extra layer of complexity and acidity.
A Side Dish Lineup That Complements the Smoky Notes
To truly complement the smoky notes inherent in this BBQ pit chicken recipe , reach for sides that offer contrast. A bright, vinegar based coleslaw cuts through the fat perfectly.
Alternatively, a simple side of oven-roasted sweet potatoes tossed with a little thyme offers an earthy sweetness that harmonizes well with the smoked paprika base.
Can This Recipe Be Adapted for an Air Fryer?
Absolutely! Once assembled and egg-washed, these pockets translate beautifully to the air fryer. Set your appliance to 375° F ( 190° C) and cook for approximately 12 to 15 minutes, checking halfway through to ensure even browning.
The air fryer is excellent at crisping the pastry quickly, making it a fantastic alternative when you need that satisfying crunch fast.

Recipe FAQs
Can I make the Porta Pit Chicken filling ahead of time?
Absolutely! Making the chicken filling a day or two in advance is actually brilliant, as the flavours have more time to deepen overnight. Just ensure you cool it completely in the fridge before assembling the pockets, otherwise, you'll ruin the pastry before it even hits the oven.
My pastry keeps turning out tough instead of flaky what am I doing wrong?
That’s a classic baking pickle! The secret to flaky pastry is keeping everything cold the butter, the water, and even the work surface if your kitchen is warm. Overworking the dough develops the gluten too much, leading to toughness.
Mix it just until it comes together, no more kneading than necessary, like you’re gently coaxing a reluctant toddler into the car.
I don’t have a Dutch oven; what’s the best way to slow cook the Porta Pit Chicken?
No problem at all; you have options! You can use a heavy bottomed casserole dish with a tight fitting lid and bake it at 300°F (150°C) for three hours, which mimics the oven braise perfectly.
Alternatively, you can use a slow cooker on the 'Low' setting for 6 8 hours just make sure you sear the meat first on the hob for colour!
How do I stop the pockets from getting soggy on the bottom during baking?
The key here is ensuring your chicken filling is reduced enough it needs to be thick, almost like a loose paste, not saucy. Also, use parchment paper on your baking sheet, and make sure your oven is properly preheated; a hot initial blast helps set the bottom crust quickly.
If you're worried, you can brush the bottom pastry lightly with a tiny bit of egg wash too.
Are these pockets freezing friendly, or should they be eaten fresh?
These freeze beautifully, which is handy for batch cooking! You can freeze them either baked or unbaked. If freezing unbaked, flash freeze them first on a tray until solid, then wrap individually.
To reheat, bake directly from frozen at a slightly lower temperature (around 375°F/190°C) for about 35 40 minutes, checking to ensure they are piping hot throughout.
Smoky Pit Chicken Pockets
Ingredients:
Instructions:
Nutrition Facts:
| Calories | 1887 kcal |
|---|---|
| Protein | 18.9 g |
| Fat | 45.8 g |
| Carbs | 95.8 g |
| Fiber | 33.6 g |
| Sodium | 7476 mg |
