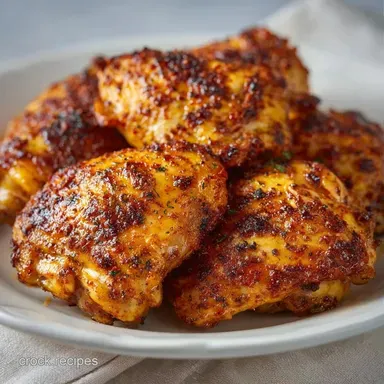
Oven Chicken Thighs: Tender and Juicy
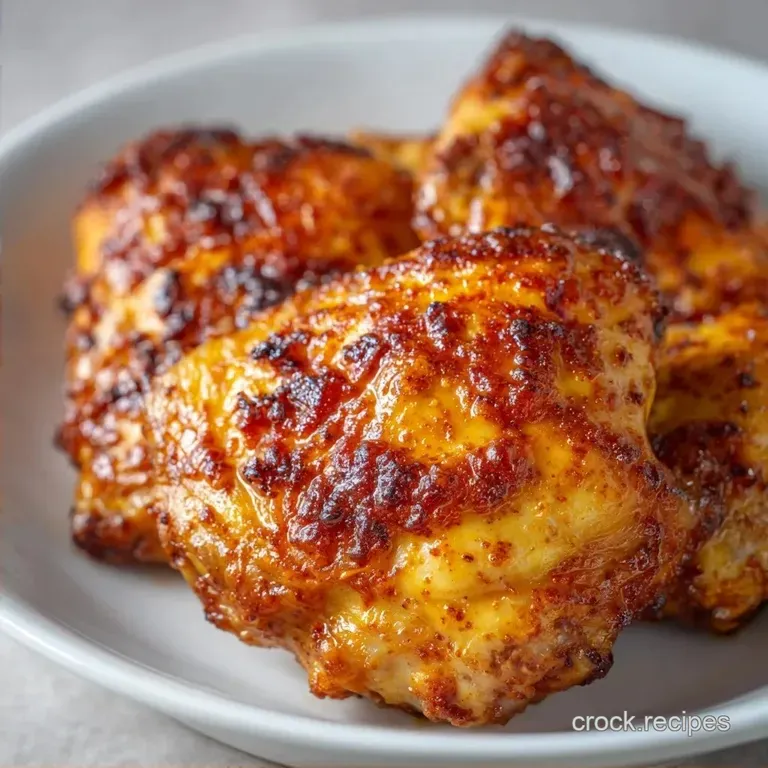
- Time: 5 min active + 40 min roasting
- Flavor/Texture Hook: Deep mahogany skin with juicy, savory meat
- Perfect for: Hearty Sunday dinner or easy weeknight meal prep
Oven Chicken Thighs for Sunday Dinner
The smell of roasting chicken is, for me, the smell of home. In many cultures, the Sunday roast isn't just a meal, it's a ritual. I remember the way my grandmother's kitchen would transform on a Sunday afternoon.
The air would get thick with the scent of garlic and paprika, and there was this specific sound, a rhythmic sizzle, that told everyone it was almost time to eat. It was the one day the whole family actually sat down together, and the center of the table was always a platter of golden brown chicken.
That tradition is why I'm so obsessed with getting this right. For a long time, I struggled with the "soggy bottom" syndrome, where the skin on top looked great but the bottom was mushy and pale. I tried everything from searing them in a pan first to using different oils.
Eventually, I realized that the secret isn't in the prep, but in the airflow.
When you make Oven Chicken Thighs, you're looking for a specific contrast. You want that skin to shatter like a thin piece of glass when you bite into it, but the meat underneath should be so tender it almost falls apart.
It's that balance of rich, savory fat and lean, juicy protein that makes this the ultimate comfort food. Let's get into how to actually achieve that without the guesswork.
Why This Method Works
Getting that perfect roast is more about physics than fancy cooking. Here is why this specific approach delivers the best results.
Over High heat Rendering: Cooking at 200°C causes the fat under the skin to melt quickly. This fries the skin in its own fat, leading to that deep mahogany color and a crisp texture.
Airflow Circulation: Using a wire rack allows heat to hit the chicken from all sides. Without it, the bottom of the thigh sits in its own juices and steams, which ruins the crunch.
Bone In Insulation: The bone acts as a heat conductor and a buffer. It prevents the meat from overcooking as quickly as the skin, ensuring the center stays moist.
Surface Dehydration: Patting the skin dry removes surface moisture. Since water turns to steam at 100°C, any leftover moisture prevents the skin from browning until that water evaporates, often leaving the meat overcooked by the time the skin is crisp.
| Method | Time | Texture | Best For |
|---|---|---|---|
| Pan Searing | 25 mins | Crispy skin, leaner meat | Quick lunches |
| Slow Cooker | 6-8 hours | Fall apart tender, soft skin | Set and forget meals |
| oven roasted | 45 mins | Balanced crisp and juicy | Family dinners |
| Air Fryer | 20 mins | Very crunchy, drier meat | Small portions |
Ingredient Breakdown
Understanding what each part of the seasoning does helps you tweak the flavor later. I don't just throw spices in a bowl; I think about how they interact with the heat.
| Ingredient | Science Role | Pro Secret |
|---|---|---|
| Olive Oil | Heat conductor | Helps the spices stick and prevents the skin from drying out too fast |
| Paprika | Color and Earthiness | Use smoked paprika for a "grilled" taste without the fire |
| Garlic Powder | Umami Base | Powder is better than fresh garlic here because fresh garlic burns at 200°C |
| Kosher Salt | Moisture Draw | Draws out surface water and seasons the meat deeply |
The Full Pantry List
I keep these staples on hand because they make Oven Chicken Thighs a breeze to put together. Don't be tempted to use low sodium salt if you want that classic roast flavor.
- 2 lbs bone in, skin on chicken thighs Why this? Skin provides the fat for crisping; bone keeps it juicy
- 2 tbsp olive oil Why this? High smoke point and neutral flavor
- 1 tsp kosher salt Why this? Larger grains are easier to distribute evenly
- 1/2 tsp black pepper Why this? Freshly cracked adds a sharp bite
- 1 tsp garlic powder Why this? Provides consistent flavor without burning
- 1 tsp paprika Why this? Gives that rich, mahogany red color
- 1/2 tsp dried oregano Why this? Adds a woody, aromatic note
Substitution Options
| Original Ingredient | Substitute | Why It Works |
|---|---|---|
| Olive Oil | Avocado Oil | Higher smoke point. Note: Very neutral flavor |
| Dried Oregano | Dried Thyme | Similar earthy profile. Note: Slightly more floral |
| Paprika | Ancho Chili Powder | Adds a mild heat. Note: Darkens the color further |
| Kosher Salt | Sea Salt | Similar mineral profile. Note: Use slightly less as it can be saltier |
I've found that if you're in a rush, you can use a pre mixed poultry seasoning, but mixing your own allows you to control the salt. Trust me, there's nothing worse than a piece of chicken that's too salty to enjoy.
The Essential Tools
You don't need a professional kitchen, but a few specific items make a huge difference. Honestly, don't even bother with a glass baking dish for this recipe; they don't conduct heat evenly.
- Rimmed Baking Sheet: This catches all the rendered fat so your oven doesn't end up with a grease fire.
- Wire Cooling Rack: This is the real hero. It lifts the meat, allowing the hot air to circulate underneath.
- Paper Towels: You'll need a few. If the chicken is wet, the skin won't crisp.
- Instant Read Thermometer: This is the only way to be sure the meat is safe without overcooking it. According to Serious Eats, pulling chicken at the right temperature is the difference between juicy and rubbery meat.
Putting the Dish Together
Let's get cooking. Make sure your oven is fully preheated before the chicken goes in, or you'll lose that initial blast of heat needed for the skin.
- Preheat your oven to 400°F (200°C). Note: This high temp is what triggers the fat rendering.
- Pat the chicken thighs bone dry with paper towels. Wait until the skin feels tacky, not wet.
- Rub the thighs with olive oil. Note: Use your hands to get the oil under the skin if you can.
- Mix the salt, pepper, garlic powder, paprika, and dried oregano in a small bowl.
- Coat all sides of the chicken evenly with the spice blend. Ensure no spots are missed.
- Place a wire cooling rack atop a large rimmed baking sheet.
- Arrange the Oven Chicken Thighs skin side up. Leave at least an inch of space between each piece.
- Roast in the center rack for 35-40 minutes until the skin is deep mahogany brown.
- Check that the internal temperature reaches 165°F (74°C).
- Transfer the chicken to a plate to rest for 5-10 minutes. Note: This lets the juices redistribute so they don't run out when you cut in.
Troubleshooting Common Roast Issues
Even with a simple recipe, things can go sideways. Most of the time, it comes down to moisture or overcrowding.
| Issue | Solution |
|---|---|
| Why Your Skin Is Rubbery | If the skin isn't shattering, it's usually because of steam. |
| Why Your Chicken Is Dry | Overcooking is the main culprit. Every oven is different, and 40 minutes is a guide, not a law. |
| Why the Seasoning Burnt | This usually happens if you used fresh minced garlic instead of powder. Fresh garlic has a high sugar content and burns quickly at 200°C, leaving a bitter, black crust. |
The "No Fail" Checklist
- ✓ Skin is patted completely dry
- ✓ Oven is preheated to exactly 200°C
- ✓ Thighs are not touching each other
- ✓ Meat rested for at least 5 minutes
Flavor Variations and Swaps
Once you've nailed the basic Oven Chicken Thighs, you can start playing with the flavors. I love switching things up based on what I'm serving on the side.
The Honey Garlic Glaze About 10 minutes before the chicken is done, brush on a mixture of honey, soy sauce, and a splash of apple cider vinegar. The sugars will caramelize and create a sticky, sweet crust. If you like this vibe, you might also enjoy my Slow Cooker Orange Chicken for a similar sticky sweet profile.
The Lemon Pepper Twist Swap the paprika and oregano for fresh lemon zest and extra cracked black pepper. This makes the dish feel much brighter and works perfectly with a side of steamed asparagus or a fresh salad.
Boneless Adaptation If you're using boneless skinless thighs, reduce the roasting time to about 20-25 minutes. Since there's no bone to protect the meat, they overcook much faster.
Note that you won't get that "shatter" effect without the skin, so I recommend a slightly heavier rub to add texture.
| Goal | Adjustment | Result |
|---|---|---|
| More Heat | Add 1/2 tsp cayenne | Spicy kick |
| More Earthy | Add 1 tsp smoked paprika | Wood fired taste |
| More Zest | Add 1 tbsp lemon juice | Bright, acidic finish |
But what about the pan drippings? Don't you dare throw them away. That liquid gold is packed with concentrated chicken flavor and rendered fat.
Storage and Zero Waste
Leftovers are almost as good as the fresh batch, provided you reheat them correctly. Store the chicken in an airtight container in the fridge for up to 4 days. For the freezer, wrap them tightly in foil and freeze for up to 3 months.
To reheat without ruining the skin, avoid the microwave. Put them back in the oven at 180°C for about 10 minutes. This crisps the skin back up without drying out the center.
Zero Waste Tip If you used bone in thighs, save the bones. Throw them in a pot with some onion scraps, celery tops, and a carrot. Simmer them for a few hours to make a rich stock, which is the perfect base for a Homemade Chicken Noodle Soup. It's a great way to make sure nothing from the bird goes to waste.
Plating and Serving Ideas
Presentation makes a difference, even if you're just eating in your pajamas. I like to pile the thighs on a wooden board or a ceramic platter.
For a hearty meal, serve them over a bed of mashed potatoes or roasted root vegetables. The potatoes soak up any extra juices from the chicken, which is the best part of the whole meal.
To balance the richness of the fat, add something bright on the side, like a vinegar based coleslaw or sautéed spinach with a squeeze of lemon.
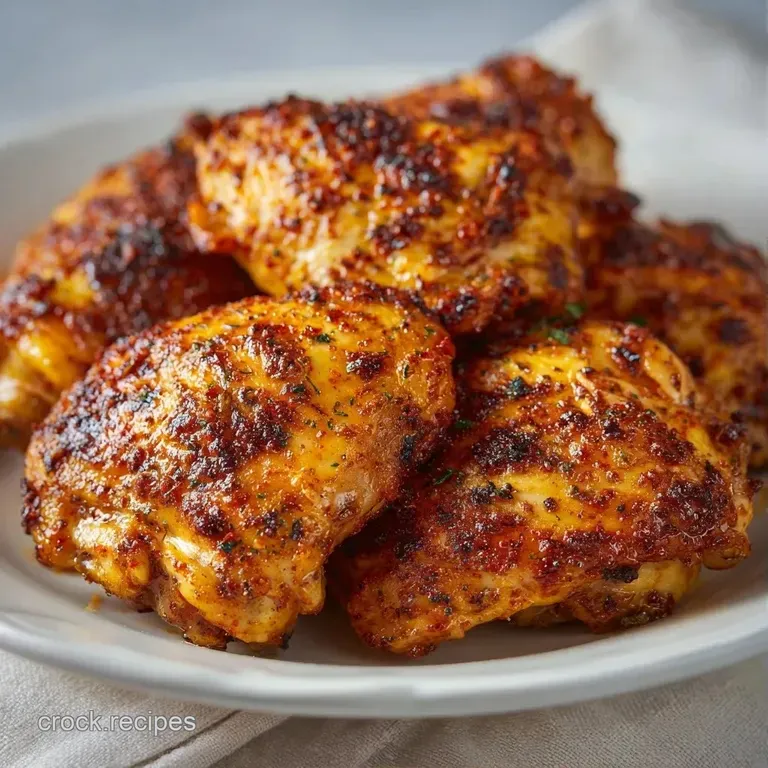
If you're serving guests, garnish with fresh parsley or a few lemon wedges. The green pop against the mahogany skin looks professional and tastes fresh. Right then, you've got a meal that looks like it took hours but actually only took a few minutes of real work.
Trust me on this, the combination of that crisp skin and tender meat is unbeatable. Once you start making your Oven Chicken Thighs this way, you'll never go back to the "dump and bake" method again. It's all about that airflow and the heat. Happy roasting!
Recipe FAQs
How to get super tender chicken thighs in the oven?
Cook to an internal temperature of 165°F and let them rest. Resting for 5 10 minutes allows the juices to redistribute, ensuring the meat stays moist and tender.
Is it better to bake chicken thighs at 375 or 400?
Use 400°F (200°C). This higher temperature is essential for rendering the fat and achieving a deep mahogany, crispy skin.
Can I use chicken thighs instead of chicken breasts?
Yes, and they are often better. Thighs have more fat and connective tissue, making them more forgiving and harder to overcook than lean breasts.
How to cook skinless chicken thighs using this method?
Follow the same seasoning and roasting steps. Since there is no skin to crisp, check for doneness slightly earlier to prevent the meat from drying out.
Are chicken thighs good for diabetics?
Yes, as they are a high protein, low-carb option. Just be mindful of portion sizes and the amount of olive oil used during preparation.
Is it true that chicken breast is the best part of the chicken for flavor?
No, this is a common misconception. Thighs contain more dark meat and fat, which provides a richer, more savory taste than the leaner breast.
What are some other great chicken thigh recipes?
Explore slow cooked or braised versions. If you like the savory depth of roasted meat, you might enjoy the rich flavors in a chicken cacciatore.
Tender Oven Chicken Thighs