Garlic Chicken Thighs: Crispy and Savory
- Time: 10 min active + 30 min roast = Total 50 min
- Flavor/Texture Hook: Shattering skin with a hearty, savory interior
- Perfect for: Easy weeknight dinners or meal prep for the week
- Garlic Chicken Thighs
- Secret to a Shattering Skin
- Recipe Specs and Details
- Ingredients and Smart Swaps
- Essential Kitchen Tools
- From Prep to Plate
- Solving Common Cooking Issues
- Troubleshooting Common Issues
- Flavor Variations to Try
- Adjusting the Batch Size
- Truths About Roasting
- Storage and Waste Tips
- Best Sides for Chicken
- Recipe FAQs
- 📝 Recipe Card
The smell of burnt garlic is something I can still detect if I close my eyes. A few years back, I tried to make a "fancy" version of this dish using a whole head of minced fresh garlic. I thought more was better, so I piled it on.
By the time the skin was actually crispy, the garlic had turned into bitter, black charcoal that tasted like a campfire gone wrong. I almost tossed the whole pan in the bin.
That failure taught me a huge lesson about heat stability. I realized that for a over high heat roast, fresh garlic is actually your enemy because it burns way before the chicken is cooked through. Switching to a high-quality powder changed everything.
Now, I get that deep, savory punch without the risk of ruining the meal.
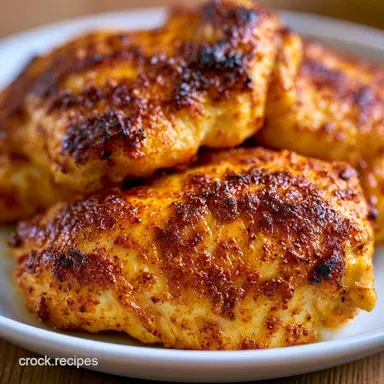
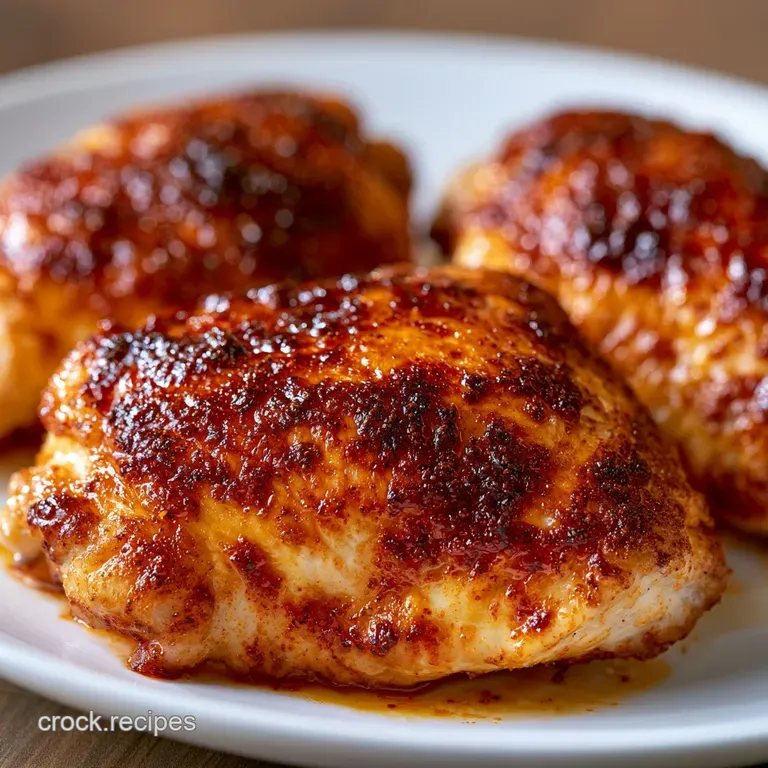
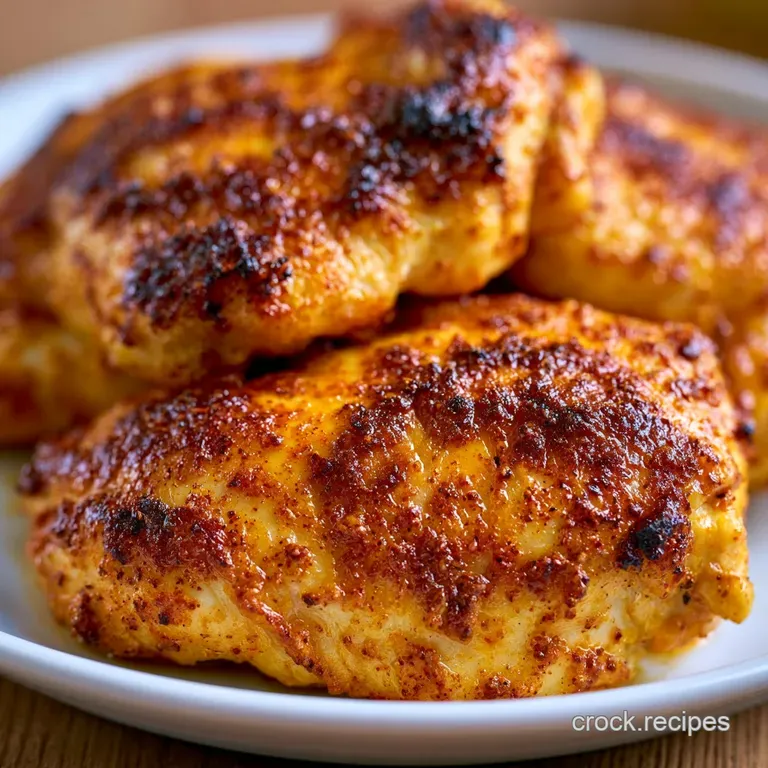
You can expect a result that hits a few different notes. The skin becomes a thin, salty shell that practically shatters when you bite into it, while the meat underneath stays velvety and juicy.
We're making Garlic Chicken Thighs that actually taste like the photo, focusing on a rich, savory profile that feels like a hug on a plate.
Garlic Chicken Thighs
The real magic here is the contrast. You have the intense, concentrated flavor of the garlic and smoked paprika hitting your tongue first, followed by the succulent, fatty richness of the chicken thigh. It's a simple combination, but when you get the skin right, it's incredibly satisfying.
Since we're using bone in, skin on thighs, we're working with a cut that's much more forgiving than a breast. The fat renders out slowly, basting the meat from the inside. If you've ever struggled with dry chicken, this is your solution.
Honestly, don't even bother with skinless thighs for this one, as you'll miss out on the best part of the experience.
Trust me on this, the prep is minimal, but the results are massive. This Garlic Chicken Thighs Recipe doesn't require any fancy techniques, just a bit of patience during the resting phase. Let's crack on and get these in the oven.
Secret to a Shattering Skin
I've spent a lot of time wondering why some chicken skin is rubbery while others crackle. It usually comes down to moisture. According to Serious Eats, any water on the surface of the meat creates steam, which prevents the skin from browning. By patting the chicken bone dry, we remove that barrier and let the fat fry the skin directly.
The Heat Stability: Garlic powder can withstand the 200°C oven temperature without scorching, whereas fresh garlic burns at much lower temperatures.
Airflow Advantage: Using a wire rack lifts the meat, allowing hot air to circulate underneath so the bottom doesn't get soggy.
Fat Rendering: High heat melts the subcutaneous fat, which then fries the skin from the underside, creating that mahogany finish.
Salt Draw: The salt in the rub pulls a tiny bit of moisture to the surface, which then evaporates quickly, leaving behind a concentrated crust.
| Method | Time | Texture | Best For |
|---|---|---|---|
| Fast Roast | 30 min | Shattering skin, juicy center | Weeknight dinners |
| Slow Roast | 60 min | Very tender, softer skin | Sunday lunch |
| Air Fryer | 20 min | Extra crispy, leaner | Small portions |
The difference between a fast roast and a slow one is mostly about the skin. For this version, we're going for the "Fast Roast" to maximize that crunch.
Recipe Specs and Details
Before we jump in, let's look at the components. We're using a specific blend of powders to create a "savory bomb." The smoked paprika isn't just for color, it adds a woody depth that mimics a grill.
Component Analysis
| Ingredient | Science Role | Pro Secret |
|---|---|---|
| Olive Oil | Heat Conductor | Helps the spices stick and prevents sticking to the rack |
| Garlic Powder | Flavor Base | Use a granulated version for a slightly thicker crust |
| Smoked Paprika | Color & Depth | Adds a subtle "outdoor" flavor without a grill |
| Kosher Salt | Texture Agent | Larger grains dissolve slower, preventing over salting |
Ingredients and Smart Swaps
You only need a few staples for this, but the quality of your spices matters. If your garlic powder has been sitting in the cupboard since 2019, it's time for a new jar.
- 2 lbs bone in, skin on chicken thighs Why this? Higher fat content prevents drying out
- 2 tbsp olive oil Why this? High smoke point and neutral flavor
- 1 tbsp garlic powder Why this? Heat stable savory punch
- 1 tsp smoked paprika Why this? Adds color and an earthy note
- 1 tsp kosher salt Why this? Better control than table salt
- 1/2 tsp black pepper Why this? Adds a sharp, floral heat
- 1/2 tsp onion powder Why this? Rounds out the garlic sweetness
| Original Ingredient | Substitute | Why It Works |
|---|---|---|
| Olive Oil | Avocado Oil | Higher smoke point. Note: Very neutral, no flavor change |
| Smoked Paprika | Sweet Paprika | Similar color. Note: Loses the smoky depth |
| Garlic Powder | Garlic Salt | Similar taste. Note: Reduce the added kosher salt by 1 tsp |
| Bone in Thighs | Boneless Thighs | Faster cook. Note: Less flavor and less juiciness |
If you're doing a low carb version, this is already basically a keto dream. Just keep an eye on the onion powder if you're extremely strict with carbs, though the amount used here is negligible.
Essential Kitchen Tools
You don't need a professional kitchen for this, but a couple of items make a huge difference. A cast iron skillet is my go to because it holds heat so well, but a standard rimmed baking sheet works just as well.
The real MVP here is the wire rack. If you place the chicken directly on the pan, the bottom of the thighs will sit in their own juices and steam. That results in a "soggy bottom," and we want a consistent roast. If you don't have a rack, you can slice up some thick carrots or onions to act as a natural trivet.
I also recommend a meat thermometer. I know some people swear by the "poke and feel" method, but getting a read of 74°C (165°F) is the only way to be 100% sure you aren't overcooking your Powder Chicken Thighs.
From Prep to Plate
Let's get into the flow. Remember, the key to this Garlic Chicken Thighs recipe is the paste. We aren't just dusting the chicken; we're creating a flavor coat.
Phase 1: The Foundation
- Pat the chicken thighs completely dry with paper towels. Note: This is the most important step for crispy skin
- In a small bowl, whisk together olive oil, garlic powder, smoked paprika, kosher salt, black pepper, and onion powder.
- Stir until a thick, reddish brown paste forms. Note: The oil should be fully absorbed by the spices
- Rub the garlic paste generously over each thigh.
- Lift the skin with your fingers and apply a bit of the mixture directly to the meat. Note: This ensures the flavor penetrates deeper
Phase 2: The Roast
- Preheat your oven to 200°C (400°F).
- Place a wire rack inside your skillet or baking sheet.
- Arrange the chicken thighs skin side up on the rack.
- Roast for 30-35 minutes until the skin is mahogany colored and crackling.
- Check the internal temperature; it should be between 74°C and 79°C (165°F to 175°F).
Phase 3: The Finish
- Remove the pan from the oven.
- Transfer the chicken to a plate and let it rest for 5-10 minutes. Note: This allows the juices to redistribute so they don't run out when you cut in
Chef's Tip: For a deeper flavor, try adding a pinch of espresso powder to your rub. It doesn't make the chicken taste like coffee, but it intensifies the savory, earthy notes of the paprika.
Solving Common Cooking Issues
Even the best of us hit a snag now and then. Most issues with Garlic Powder Chicken Thighs come down to temperature or moisture.
Troubleshooting Common Issues
| Issue | Solution |
|---|---|
| Why Your Skin Isn't Crispy | If the skin is rubbery, you likely had too much moisture on the surface or the oven wasn't hot enough. Ensure you're using a rack so the air can hit the bottom. |
| Why Your Chicken is Dry | Overcooking is the main culprit here. Thighs are forgiving, but if they go past 85°C (185°F), they start to lose that velvety texture. Use a thermometer to pull them out exactly on time. |
| Why the Rub Tastes Burnt | If you see black spots on the skin, your oven might be running hot, or you didn't use enough oil in the paste. The oil acts as a buffer for the spices. |
Common Mistakes Checklist:
- ✓ Did you pat the skin completely dry?
- ✓ Did you lift the skin to rub the meat?
- ✓ Did you use a wire rack for airflow?
- ✓ Did you let the meat rest for at least 5 minutes?
- ✓ Did you check the temp with a thermometer?
Flavor Variations to Try
Once you've mastered the base version, you can start playing with the profile. The beauty of this dish is how well it handles different accents.
The Zesty Twist
For something brighter, squeeze half a lemon over the chicken as soon as it comes out of the oven. The acid cuts through the richness of the fat and makes the garlic pop.
Honey Garlic Glaze
If you like a sweet savory contrast, mix 1 tbsp of honey with a splash of soy sauce. Brush this over the chicken during the last 5 minutes of roasting. It creates a sticky, lacquered finish that is incredibly satisfying.
The Butter Herb Swap
Replace the olive oil with melted salted butter and add a teaspoon of dried thyme. This gives the dish a more classic, "roast dinner" vibe that feels very hearty.
Decision Shortcut
- If you want maximum crunch, use a wire rack and 200°C.
- If you want a sticky glaze, add honey in the final 5 minutes.
- If you want a fresher taste, finish with fresh parsley and lemon.
Adjusting the Batch Size
Cooking for two is different than cooking for a crowd. When you change the amount of meat, you can't always just double the spices.
Scaling Down (½ batch): Use a smaller pan so the chicken stays close together, which helps maintain humidity in the oven. Reduce the roasting time by about 5-10 minutes, as smaller masses heat up faster.
Scaling Up (2x-4x batch): Don't crowd the pan. If the thighs are touching, they will steam instead of roast, and you'll lose that shatter crisp skin. Work in batches or use two separate pans.
Only increase the salt and spices to 1.5x the original amount, as the flavors concentrate more in larger batches.
| Item | Premium Choice | Budget Choice | Impact | Savings |
|---|---|---|---|---|
| Oil | Extra Virgin Olive Oil | Vegetable Oil | Slight loss in fruitiness | Low |
| Salt | Maldon Sea Salt | Table Salt | Less crunch in the crust | Low |
| Chicken | Organic Air Chilled | Standard Bone in | Slightly less juiciness | Medium |
Keep in mind that using a convection oven (fan on) will speed up the process. If you have a fan, lower the temp by about 20°C to prevent the spices from burning before the meat is done.
Truths About Roasting
There are a few things people tell you about chicken that just aren't true. Let's set the record straight.
Searing meat does not "seal in juices." This is a huge myth. Whether you sear first or just roast, the moisture loss is almost the same. The reason we sear (or roast at high heat) is for the flavor and the texture of the crust, not to lock in water.
Another common misconception is that fresh garlic is always better. In a slow stew, yes. In a 200°C oven, no. Powdered garlic is the superior choice for over high heat roasting because it distributes evenly and doesn't burn as easily.
Storage and Waste Tips
If you have leftovers, store them in an airtight container in the fridge for up to 4 days. To reheat, avoid the microwave if you can, as it will turn the skin rubbery. Instead, pop them back in the oven at 175°C (180°C) for 10 minutes to bring back some of that crunch.
For freezing, let the chicken cool completely. Wrap each thigh tightly in foil and place them in a freezer bag. They'll stay good for up to 3 months. Thaw in the fridge overnight before reheating in the oven.
Don't throw away the bones! If you have a few thighs left over, simmer the bones with some celery, carrots, and onion to make a quick stock. This is the perfect base for a Homemade Chicken Noodle Soup later in the week. It's a great way to ensure zero waste in your kitchen.
Best Sides for Chicken
Since these thighs are rich and savory, you want sides that either lean into that comfort or provide a sharp contrast to cut through the fat.
For a complete comfort meal, I love serving these with creamy mashed potatoes and sautéed spinach. The potatoes soak up any extra garlic oil that drips off the chicken, making every bite satisfying.
If you're looking for something lighter, a crisp arugula salad with a lemon vinaigrette is the way to go. The peppery greens and acidity balance the heartiness of the meat. For another great option, you could try serving them alongside some Lemon Chicken Gnocchi for a meal that feels a bit more special.
Alternatively, roast some broccoli or asparagus on the same baking sheet (just move the chicken to a smaller rack) during the last 15 minutes of cooking. It's an easy way to get your greens in without using another pan.
Recipe FAQs
Is garlic powder good for chicken thighs?
Yes, it is an excellent choice. It blends into a stable paste with olive oil and paprika, ensuring a consistent flavor and a mahogany colored crust that fresh garlic would burn at high temperatures.
How to cook bone-in chicken thighs in the oven?
Preheat your oven to 400°F (200°C). Arrange the thighs skin side up on a wire rack and roast for 30 35 minutes until the internal temperature reaches 165°F to 175°F.
How to roast boneless skinless chicken thighs?
Reduce the roasting time by 10-15 minutes. Because there is no bone or skin to insulate the meat, these cook much faster and can dry out if left in for the full 35 minutes.
Are chicken thighs a good choice for diabetics?
Yes, they are generally a healthy option. Thighs provide high protein and satiety, though you should balance them with non-starchy vegetables to manage overall glycemic impact.
Is it true that you must use fresh garlic to get a flavorful crust?
No, this is a common misconception. Garlic powder creates a more concentrated rub that adheres better to the meat and survives the 400°F heat without scorching.
How to reheat leftover chicken thighs without losing the crunch?
Bake them at 175°C (180°C) for 10 minutes. Avoid using a microwave, as the trapped steam will turn the skin rubbery instead of crispy.
What can I create with the leftovers?
Shred the meat for tacos or pasta. If you enjoyed the simple roasting technique here, see how we use a similarly rich protein base in our chicken enchiladas.
Garlic Chicken Thighs