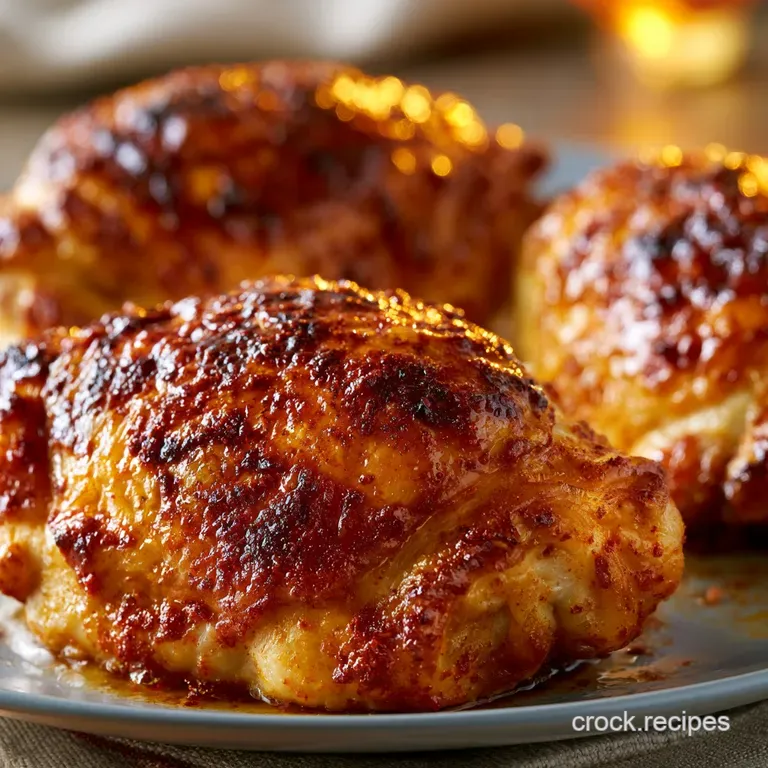
Oven Roasted Chicken Thighs: Ultra Crispy
- Time:10 minutes active + 40 minutes cooking = Total 60 minutes
- Flavor/Texture Hook: Shattering mahogany skin with velvety, tender meat
- Perfect for: Hearty weeknight comfort food or beginner friendly hosting
Oven roasted Chicken Thighs
I remember the first time I tried to host a dinner party with a roast. I just threw the chicken on a tray, thinking the oven would do all the heavy lifting. The result was a pale, rubbery skin that felt like chewing on a wet eraser, and the meat was barely cooked through.
It was a total disaster and I felt like a complete amateur in my own kitchen.
The problem wasn't the heat, but the moisture. I'd left the chicken damp and crowded the pan, essentially steaming the meat instead of roasting it. I spent the next few months obsessing over how to get that specific, deep brown color and a skin that actually cracks when you bite into it.
Once I figured out the drying process and the right temperature, everything changed. Now, these oven roasted Chicken Thighs are my go to whenever I need something satisfying and hearty without spending three hours in the kitchen.
Trust me on this, the difference between a "good" chicken thigh and a "shattering" one is just a few paper towels and a bit of patience.
The Secret to Success
- Surface Dehydration: Moisture on the skin creates steam, which prevents browning. By patting the skin bone dry, you allow the fat to render quickly and the skin to shatter.
- over High heat Blast: Cooking at 425°F triggers a rapid sear on the outside. According to Serious Eats, high heat is essential for rendering the subcutaneous fat that makes skin crispy.
- Bone In Protection: The bone acts as an insulator, slowing down the heat transfer to the center of the meat. This keeps the interior velvety while the outside gets that deep mahogany color.
- Fat Barrier: Olive oil doesn't just carry the spices, it creates a heat conducting layer. This ensures the paprika and garlic powder toast rather than burn.
| Method | Time | Texture | Best For |
|---|---|---|---|
| Oven Roast | 40 mins | Shattering skin, juicy center | Large batches, hands off |
| Stovetop | 25 mins | Crispy bottom, softer top | Small portions, speed |
| Air Fryer | 20 mins | Uniformly ultra crisp | Single servings, maximum crunch |
Flavor Foundation
| Ingredient | Science Role | Pro Secret |
|---|---|---|
| Bone in Thigh | Structural Integrity | Bone marrow leaks flavor into the meat |
| Smoked Paprika | Color & Depth | Gives that deep mahogany look without overcooking |
| Kosher Salt | Protein Breakdown | Draws moisture out of skin for better crunch |
| Olive Oil | Heat Conductor | Prevents spices from scorching at 425°F |
Essential Ingredients
- 2 lbs bone in, skin on chicken thighs Why this? More fat and flavor than breasts (Substitute: Boneless skin on thighs - note: cooks 10 mins faster)
- 2 tbsp olive oil Why this? High smoke point for roasting (Substitute: Avocado oil - note: slightly more neutral taste)
- 1 tsp kosher salt Why this? Coarser grains for even coating (Substitute: Table salt - note: use only 1/2 tsp to avoid oversalting)
- ½ tsp black pepper Why this? Adds a subtle bite (Substitute: White pepper - note: milder, more earthy)
- 1 tsp garlic powder Why this? Doesn't burn as fast as fresh garlic (Substitute: Onion powder - note: sweeter, less pungent)
- 1 tsp smoked paprika Why this? Provides a rich, wood fired aroma (Substitute: Sweet paprika - note: less depth, brighter red color)
- ½ tsp dried oregano Why this? Earthy balance to the smoke (Substitute: Dried thyme - note: more floral, classic roast flavor)
Essential Gear
Right then, let's look at the kit. You don't need a professional kitchen, but a few specific tools make this way easier. First, a heavy duty baking sheet is a must. Avoid those thin, cheap pans that warp in the oven, as they create "cold spots" where your chicken might sit in its own juices and get soggy.
I highly recommend using parchment paper or a silicone mat. Not only does it stop the chicken from sticking, but it also makes cleanup a breeze. If you have a wire cooling rack that fits inside your baking sheet, use it!
Lifting the chicken off the pan allows hot air to circulate underneath, meaning you don't have to flip the thighs to get the bottom from being mushy.
Finally, get a digital meat thermometer. Trusting your eyes is okay, but hitting exactly 165°F is the difference between velvety meat and something that tastes like cardboard.
Cooking Steps
- Preheat your oven to 425°F (218°C). Line a baking sheet with parchment paper or grease a skillet to prevent sticking.
- Grab some paper towels and pat the chicken thighs completely dry. Note: Even a tiny bit of moisture will stop the skin from shattering.
- In a small bowl, whisk together the olive oil, kosher salt, black pepper, garlic powder, smoked paprika, and dried oregano.
- Rub the spice mixture generously over every inch of the chicken. Note: Make sure you get some under the skin for maximum flavor.
- Place the chicken skin side up on your prepared pan. Ensure there is at least an inch of space between each thigh so they don't steam each other.
- Roast for 35-40 minutes. Wait for the aroma to shift from raw poultry to a rich, smoky scent and look for the skin to turn a deep mahogany brown.
- Use your thermometer to check the thickest part of the thigh. Remove from the oven once it hits 165°F (74°C).
- Transfer the chicken to a plate and let it rest for 5-10 minutes. Note: This allows the juices to redistribute so they don't all run out on the first cut.
Fix Common Flubs
Getting the skin right can be tricky the first few times. Most people struggle with the texture, but it's usually a simple fix.
Rubbery Skin Texture
If the skin is chewy instead of crispy, you likely had too much moisture on the surface or the oven wasn't hot enough. The fat needs to render out completely to create that shatter.
Dry Overcooked Meat
Even thighs can dry out if left too long. If the meat feels stringy, you've gone past the ideal internal temperature. Always pull them at 165°F.
Burnt Spice Rub
If the paprika tastes bitter or looks black, the oven may have a "hot spot." Rotate your pan halfway through the cooking time to ensure even heat.
| Problem | Root Cause | Solution |
|---|---|---|
| Pale skin | Low temp or damp skin | Pat dryer, use 425°F |
| Soggy bottom | Crowded pan | Space out thighs or use a rack |
| Meat is raw near bone | Under roasted | Cook 5 mins longer, check temp |
Common Mistakes Checklist
- ✓ Patting skin dry with paper towels
- ✓ Using a high enough oven temperature (425°F)
- ✓ Leaving space between chicken pieces on the pan
- ✓ Resting the meat before slicing
- ✓ Using a thermometer instead of guessing
Flavor Variations
If you're feeling adventurous, you can easily pivot this recipe. For a bright, zesty vibe, add the zest of one lemon and a tablespoon of melted butter to your spice rub. The acidity cuts through the richness of the thighs beautifully.
For those who love a bit of heat, swap the smoked paprika for chipotle powder. It adds a spicy, lingering warmth that pairs great with a side of cool slaw. If you're in a rush and want an even faster method, you might try my Crispy Air Fryer Chicken approach, which uses a similar spice profile but cuts the time.
You can also turn this into a one pan meal. Toss some chopped carrots and halved baby potatoes in the same oil and spice mix and scatter them around the chicken. Just make sure the vegetables are in a single layer, or they'll steam and get mushy.
Scaling Guidelines
When you're cooking for a crowd, don't just double everything blindly. If you're making 12 thighs instead of 6, you'll need two separate baking sheets. If you crowd one pan, you'll end up back with that rubbery skin we're trying to avoid.
For larger batches, keep the spices and oil the same ratio, but increase your roasting time by about 5-10 minutes since the oven temperature will drop more when you load it up with more cold meat.
If you're just cooking for one or two people, reduce the recipe to 2-3 thighs. You can lower the oven temperature by 25°F to prevent the smaller amount of meat from overcooking too quickly, and check the internal temperature starting at 30 minutes.
Common Cooking Myths
The Searing Myth: Many people think you need to sear chicken in a pan before putting it in the oven to "seal in the juices." This is simply not true. Moisture loss happens regardless of how you start. The oven roast at 425°F does the searing for you, saving you a dirty pan.
The Bone In Difficulty: Some think bone in chicken is harder to cook through. In reality, the bone provides a thermal buffer that actually makes it harder to overcook the meat compared to boneless thighs, which can turn dry in a heartbeat.
Storage Guidelines
Once cooled, store your chicken in an airtight container in the fridge for up to 4 days. To reheat, avoid the microwave if you want to keep the skin from getting soggy. Instead, pop them back in the oven at 350°F for about 10 minutes.
For the freezer, let the chicken cool completely and wrap each thigh individually in foil before placing them in a freezer bag. They'll stay good for up to 3 months. Thaw them in the fridge overnight before reheating in the oven.
Don't throw away the leftover bones! Put the roasted bones in a pot with water, an onion, and a carrot to make a rich, roasted chicken stock. It's a huge flavor upgrade over using raw bones.
Hearty Side Pairings
Since these thighs are rich and smoky, you need sides that provide a bit of contrast. A crisp green salad with a sharp vinaigrette or some steamed broccoli work wonders to cut through the fat.
If you want a more comforting meal, serve them over a bed of creamy mashed potatoes or buttery polenta. The mahogany drippings from the pan make an incredible natural sauce for the potatoes.
For a different take on chicken night, you might compare this hearty roast with something like Slow Cooker Orange Chicken, which offers a sticky, sweet contrast to the savory, salty profile of these roasted thighs. Either way, you're getting a satisfying meal that feels like a hug on a plate.
Recipe FAQs
Should I bake chicken thighs at 350 or 400?
Use 425°F (218°C). This higher temperature is essential for rendering the fat and achieving a deep mahogany brown, crispy skin.
How long to roast chicken thighs in the oven?
Roast for 35 40 minutes. Ensure the internal temperature of the thickest part of the thigh reaches 165°F (74°C) before removing from heat.
How to cook chicken thighs in the oven with bones?
Preheat the oven to 425°F and pat the skin completely dry. Rub the thighs with the oil and spice mixture, then roast skin side up for 35-40 minutes.
How to roast boneless skinless chicken thighs?
Reduce the roasting time to 20-25 minutes. Since they lack the insulating bone and skin, they cook much faster and can dry out if left for 40 minutes.
What can I create with chicken thighs and cheddar cheese?
Top the roasted thighs with cheddar during the last 5 minutes of cooking. This creates a rich, melted crust. If you enjoy this flavor profile, see how the same principle works in our French chicken bake.
Are chicken thighs bad for LDL cholesterol?
No, provided they are eaten in moderation. While they contain more saturated fat than breasts, removing the skin before eating significantly lowers the fat content.
Can I eat chicken thighs with IBS?
Yes, as plain chicken is generally well tolerated. Just be mindful of the garlic powder and paprika if you are sensitive to those specific seasonings.
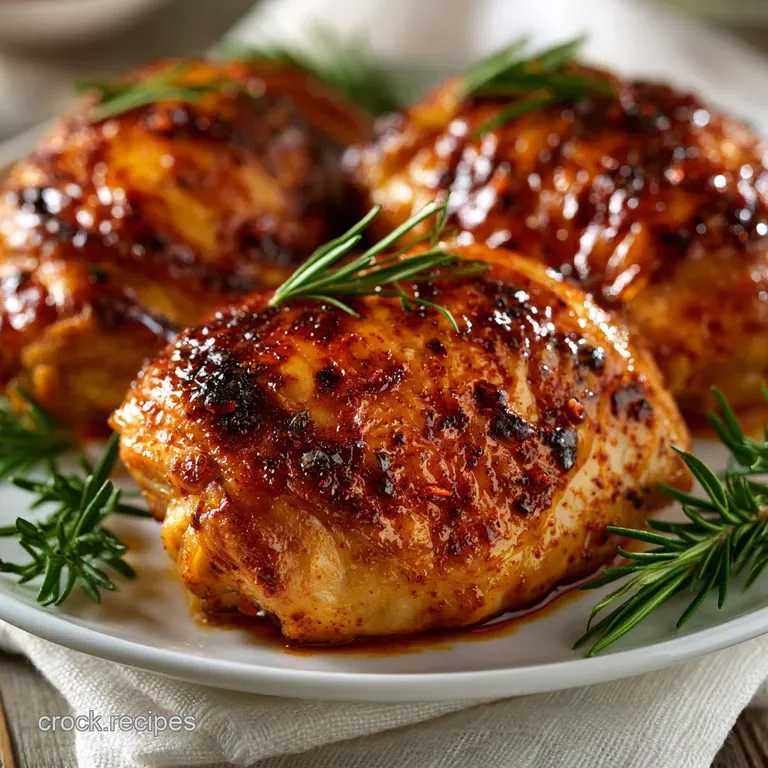
oven roasted Chicken Thighs 2

