The Ultimate Makeover Crispy Baked Chicken Chimichangas
- Ditch the Grease: Introducing Your New Favourite Crispy Baked Chicken Chimichangas
- Why This Baked Approach Trumps Deep-Frying Every Time
- Gathering Your Components for Perfect Baked Chicken Chimichangas
- Mastering the Prep: Shredding the Chicken and Filling Assembly
- Elevating Your Chimichanga Experience with Toppings and Dips
- Recipe FAQs
- 📝 Recipe Card
Ditch the Grease: Introducing Your New Favourite Crispy Baked Chicken Chimichangas
Forget everything you thought you knew about achieving that perfect, satisfying crunch from a burrito like package. We are ushering in a new era of Tex-Mex indulgence, one where maximum flavour meets minimum oil.
This Baked Chicken Chimichangas recipe is my personal go-to when that craving for something savory, crispy, and deeply comforting hits. We’re taking tender shredded chicken chimichangas and transforming them into a golden brown masterpiece using nothing more than the heat of your oven.
This approach proves that you absolutely do not need a deep fryer to achieve textural bliss, making this one of the best Comfort Food Chicken Recipes you’ll keep in heavy rotation.
Why This Baked Approach Trumps Deep Frying Every Time
The fundamental magic here lies in the swapping of cooking mediums oil for hot, circulating air. This shift doesn't just marginally reduce calories; it fundamentally alters the experience, making for a cleaner, brighter flavour profile that lets the seasoned filling shine through.
The Healthier Tex-Mex Triumph You Didn't Know You Needed
When you opt for the oven, you are embracing a Healthy Baked Chicken Chimichangas method. We still use fat a light brushing of butter or oil but it’s strategically applied to the exterior to promote browning, rather than saturating the entire tortilla casing.
This technique allows us to deliver that signature exterior snap while keeping the interior hearty and moist, providing a superior guilt free indulgence compared to their fried counterparts.
Unlocking Superior Texture Without Submerging in Oil
The key to achieving crispness in the oven hinges on two factors: the initial warmth of the tortilla and the final application of fat before baking. By gently warming the large flour tortillas, we gain the flexibility needed for a tight roll, preventing cracks.
Then, brushing the exterior with melted butter mimics the effect of shallow frying, ensuring that every bite offers that rewarding, shatteringly crisp sensation we all adore in Homemade Chimichangas .
Setting the Stage: What Makes This Chimichanga Recipe Special
What truly sets this particular Baked Chicken Chimichangas Recipe apart is the filling itself. We are moving beyond simple, dry shredded chicken. We sauté aromatics like onion and garlic, bloom potent spices like cumin and chili powder, and crucially add a touch of softened cream cheese for an incredible, subtle richness.
This inclusion turns these into decadent Baked Chimichangas with Cream Cheese , creating a filling that holds together beautifully and tastes intensely flavourful, even after baking.
Related Recipes Worth Trying
- Quick Cheesy Garlic Chicken Wraps Recipe 30 Mins — Whip up these restaurantquality Cheesy Garlic Chicken Wraps in under 30 minutes A rich gooey filling perfect for an easy chicken dinner
- UltraCreamy Garlic Parmesan Chicken Ready in 30 Mins — The ultimate Creamy Garlic Parmesan Chicken recipe Panseared chicken drenched in a velvety sauce Your new favourite Easy Garlic Parmesan Chicken dinner
- Creamy Tuscan Marry Me Chicken Recipe Juicy Rich Dinner — Stop dreaming of restaurant quality This Creamy Tuscan Marry Me Chicken recipe delivers juicy chicken in a sundried tomato sauce thats surprisingly easy to...
Gathering Your Components for Perfect Baked Chicken Chimichangas
A successful bake starts with meticulously chosen ingredients. Since the cooking time is short, the quality of your starting components really stands out in the final product. We are aiming for deep, savory notes balanced by the fresh brightness needed for proper accompaniment.
Essential Tools for Assembly and Baking Success
Before we dive into the flavour components, ensure your equipment is ready. You’ll require a large, sturdy skillet for developing the filling, a large bowl for mixing, and most importantly, a substantial baking sheet.
Lining this sheet with parchment paper or a silicone baking mat is non-negotiable; it prevents any buttery drips from sticking and aids in achieving an even crisp on the bottom of your Easy Baked Chicken Chimichangas .
The Secret Sauce: Spice Mix Breakdown for Maximum Depth
The flavour foundation relies on a simple yet potent dry rub applied directly to the filling. We incorporate 1 teaspoon each of ground cumin and chili powder, complemented by 1/2 teaspoon of dried oregano.
When these spices hit the hot oil alongside the sautéed onions and garlic, they toast beautifully, releasing volatile oils that permeate every strand of the shredded chicken. This step is vital; don’t rush the minute you spend allowing these spices to bloom.
Prepping Your Baking Sheet: Necessary Gear and Non-Stick Prep
Once the filling is assembled and the tortillas are warmed, the assembly process moves quickly. Prepare your workspace by having your melted butter (or light olive oil) ready with a pastry brush nearby. The goal is a thin, even coating over the entire exterior of the rolled wraps.
Think of this light glaze as the varnish on your masterpiece it’s what transforms soft dough into crisp gold during the Baked Chimichangas with Refried Beans experience, whether you add beans or not!
Mastering the Prep: Shredding the Chicken and Filling Assembly
The filling needs to be flavorful but not wet. Moisture is the arch nemesis of oven crispness. Whether you’ve poached your chicken or wisely utilized a rotisserie bird, having 2 cups of finely shredded meat is the starting point for this recipe.
Step-by-step: Creating the Flavorful Shredded Chicken Base
Begin by softening half a diced yellow onion in 1 tablespoon of olive oil until translucent. Introduce two minced cloves of garlic for about 60 seconds until fragrant. This is when you stir in your prepared spice mix (cumin, chili powder, oregano) and cook briefly before adding the shredded chicken and 1/4 cup of broth or water to help the spices adhere.
Finally, swirl in the optional softened cream cheese; it melts down beautifully, binding the filling so it doesn't spill out during the crucial rolling stage. Taste and adjust salt and pepper vigorously now, as this is your last chance to season the interior.
Tightly Wrapping Techniques: Ensuring No Filling Escapes Mid-Bake
This stage requires a gentle but firm hand. Lay a warmed tortilla flat. Place roughly 1/3 cup of the slightly cooled filling slightly off-center, leaving room on the sides. Fold the left and right edges inward, creating a secure ‘envelope’ around the filling.
Then, take the bottom edge and fold it tightly up over the filling, tucking it in securely. Roll upwards until you have a perfectly sealed, compact cylinder. Place this seam side down immediately onto your prepared baking sheet.
Applying the Light Glaze for That Essential Golden Crust
Once all six wraps are nestled on the sheet, grab your pastry brush. Generously coat the visible top surface of each roll with melted butter or oil. For those who enjoy a touch of extra texture and cheesy goodness, this is the moment to sprinkle a light dusting of Monterey Jack or cheddar over the top.
This final coat is the non-negotiable step that ensures your Baked Chimichangas with Cream Cheese bake up beautifully golden and crisp.
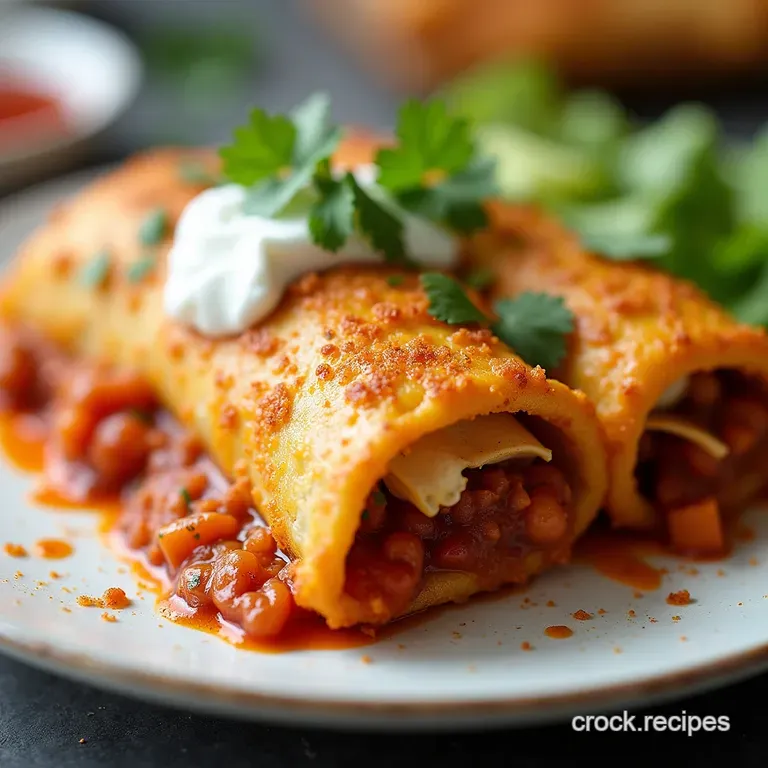
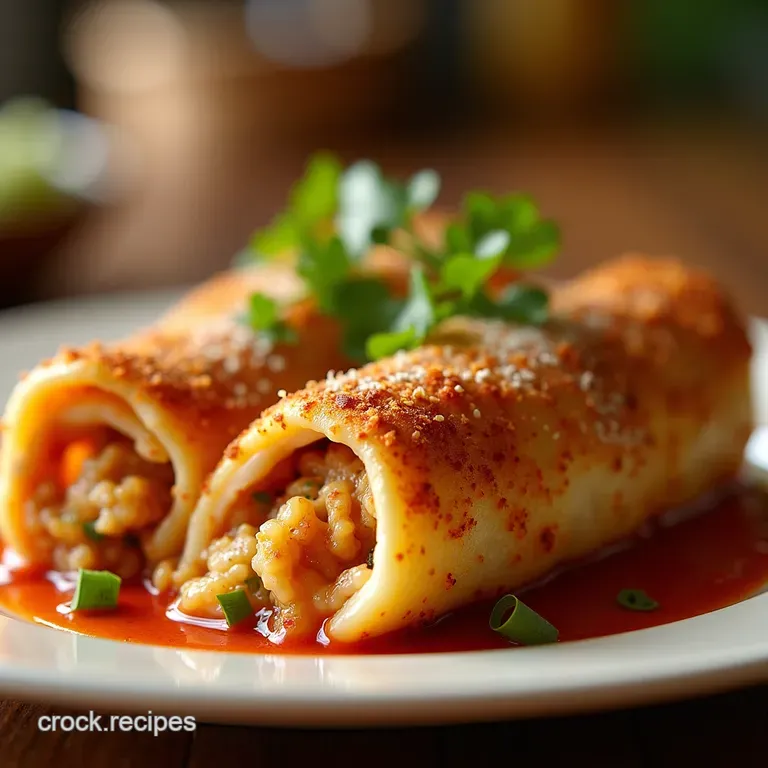
Elevating Your Chimichanga Experience with Toppings and Dips
A chimichanga, even a perfectly baked one, demands compelling accompaniments. The heat and the savory depth of the spiced chicken filling beg for cooling elements and acidic freshness to complete the Tex-Mex flavour profile.
Beyond Sour Cream: Creative Condiments for Your Baked Chicken Chimichangas
While a generous dollop of sour cream is classic, don't stop there. For a vibrant contrast to the richness of the Shredded Chicken Chimichangas , I highly recommend a chunky, homemade Pico de Gallo. The fresh tomato, onion, cilantro, and lime juice cut through the richness perfectly.
Alternatively, a drizzle of sharp, smoky salsa verde provides an exciting tang. If you are looking for a full meal experience, these Chicken Chimichangas with Sauce are excellent when drenched in a light, warm enchilada style sauce, though be aware that saucing will soften the crispness achieved in the oven.
Troubleshooting Common Baking Issues and Crispness Hacks
If your chimichangas are coming out soft rather than crisp, chances are your filling was too moist, or you skimped on the exterior butter brush. A good hack is to ensure your oven temperature is accurate ( 400° F/ 200° C is crucial) and to utilize the convection setting if available.
Flipping them halfway through the 20 25 minute bake time ensures even exposure to the heating elements, guaranteeing a uniform crispness across the entire surface.
Meal Prep Mastery: Freezing, Reheating, and Refreshing Leftovers
One of the best features of this recipe is its adaptability for meal prep. Once assembled but before brushing with butter/oil, you can wrap each uncooked chimichanga tightly in plastic wrap, then foil, and freeze them.
When ready to cook, simply thaw overnight in the fridge, brush with butter, and bake following the standard instructions. Leftovers, if you are lucky enough to have any, reheat beautifully in a toaster oven or air fryer ( 350° F/ 175° C for 8– 10 minutes) to recapture that fresh from-the-oven crunch.
This makes preparing ahead for easy weeknight dinners featuring these Easy Baked Chicken Chimichangas a breeze.
Recipe FAQs
How do I stop my tortillas from ripping when rolling these Baked Chicken Chimichangas?
Ah, that’s the age-old trick! The secret lies in warming those tortillas first, much like you would for a proper burrito. Give them about 15 seconds per side in a dry, hot skillet or a quick zap in the microwave until they are soft and pliable.
This stops them from snapping when you try to get that tight, snug roll.
My chimichangas aren't getting crispy enough; what crucial step am I missing in the baking process?
Crispiness is all about moisture management and the finishing brush! First, ensure your chicken filling isn't swimming in liquid too much moisture steams the tortilla instead of letting it crisp.
Second, you must be generous when brushing the tops with melted butter or oil; this fat is what gets golden and mimics that satisfying crunch from frying.
Can I make these Baked Chicken Chimichangas ahead of time, and how should I store leftovers?
You absolutely can prep them ahead! Roll them up, place them seam side down on a tray, cover tightly, and they’ll happily wait in the fridge for a day. For leftovers, store them in an airtight container for up to three days, but be warned: they are best revived in an oven or toaster oven at 350°F (175°C) rather than the microwave to bring back that lovely crispness.
I’m trying to keep things light; can I substitute the butter used for brushing?
If you're keen on avoiding butter, light olive oil is a smashing substitute for brushing the tops, providing the necessary fat for browning without adding heavy richness. For an even lighter take, you could even try a light spritz of cooking spray, but you might sacrifice a tiny bit of that deep golden colour the melted butter gives you.
What’s the best way to ensure the filling tastes authentic and not bland?
Authenticity comes down to those spices and building flavour! Make sure you toast your cumin, chili powder, and oregano for about 30 seconds after sautéing the onions and garlic this wakes up the flavour no end.
Also, don’t be shy with salt and pepper, and a splash of broth keeps the shredded chicken moist enough to carry those lovely Tex-Mex notes.
Crispy Baked Chicken Chimichangas

